Understanding the Blue Dot on Queen Bees
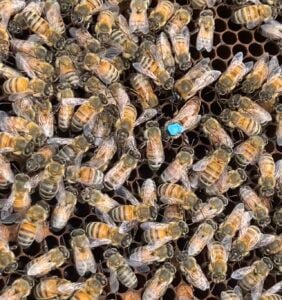
The blue dot on your queen bee is a mark applied by a beekeeper to make her easier to find in the hive. Therefore, It is completely normal and very helpful!
Here’s why it’s there and what it means:
🔵 What the Blue Dot Means:
Beekeepers use a universal color code to mark queens based on the year the queen was born; however, marking your queen is not mandatory.
| Color | Year Ending In |
| White | 1 or 6 |
| Yellow | 2 or 7 |
| Red | 3 or 8 |
| Green | 4 or 9 |
| Blue | 5 or 0 |
So a blue dot means your queen bee was likely born in 2020 or 2025.
🐝 Why Mark a Queen?
- Easier to find during hive inspections
- To Track her age
- Consequently, to know if she’s been replaced (if you find an unmarked queen suddenly)
- No harm to the queen — it’s usually done with special non-toxic paint or pens
🧰 Essential Tools to Mark Your Queen Bee:
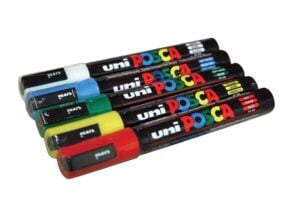
1. Queen Marking Pen
- Purpose: Non-toxic paint pen to mark the thorax
- Thus, the recommended Brand: Posca PC-5M (widely used by beekeepers)
- Colors follow the international code:
- White – Years ending in 1 or 6
- Yellow – 2 or 7
- Red – 3 or 8
- Green – 4 or 9
- Blue – 5 or 0
2. Queen Marking Tube or Cage
Choose one of the following or you can buy both to decide which you like best
🌀 Queen Marking Tube (most precise)
- Clear cylinder with soft foam or mesh at one end
- Additionally, gently press the queen against the mesh to mark her thorax
🐝 Queen Catcher Clip
- Spring-loaded clip with slotted sides
- At the same time, traps the queen safely while letting workers escape
- Therefore, use your fingers or a marking pen to apply the mark through the slots
🐝 Push-In Cage (Alternative)
- Mesh cage you gently press into a comb over the queen
- Specifically, used to temporarily isolate her on a frame while you mark
3. Queen Clip Catcher
(Optional but helpful)
- Additionally, a small hand-held clip used to catch and gently contain her before transferring to the tube or marking cage
✨ Optional Add-ons:
- In the beginning, get a practice drone frame (use drones to practice catching and marking)
- Next, use magnifying glasses or headlamp (if eyesight or lighting is tricky)
- Likewise use a paper towel or card to test paint dot before applying
🐝 Step-by-Step: How to Mark Your Queen Bee
1. Find the Queen
- She’s longer and moves with purpose.
- Look for a slimmer body than a drone and a smooth back.
- Use your hive tool gently to isolate the frame she’s on.
2. Catch the Queen
There are 3 safe ways to catch her:
- First, fingers (careful, very gentle — hold her thorax, not abdomen)
- Second, a queen clip (like a hair clip with slots for bees to exit but not her)
- Last, use a queen marking tube (clear cylinder with soft mesh plunger)
3. Immobilize Gently
- Use a marking tube with a sponge or mesh plunger to hold her gently against the mesh so she can’t move.
- Carefully expose her thorax — the middle section between her head and abdomen.
4. Apply the Mark
- Use a tiny dot of paint (just enough to see, not blob or smear)
- And place the dot on the top center of the thorax
- Afterwards, let her dry for 10–30 seconds
5. Release Her Back
- Finally, let her walk back onto a frame or gently place her there.
- Most importantly, watch to make sure the workers accept her (they usually do quickly if she was already their queen).
✅ Last – Tips for Success:
- Practice on drones first — they’re big and harmless.
- Of couse, avoid hot or windy days.
- Above all. don’t touch her abdomen (you could damage her reproductive organs).
- Addtionally, keep her calm — no shaking or fast movements.
🛒 Where to Get The Supplies: http://www.honeystrong.com
Finally, to learn more about beekeeping here: What makes honeybees aggressive: things you need to know